
Yes, in the design mode you can change the lines which go between one step and another
You can adjust the process diagram arrangement that is automatically generated by the Engage Process Modeler using the Design tab. When you select this tab the background of the process diagram is enriched with a grid both to facilitate the positioning of the diagram components and to distinguish the design mode from the mapping mode.
Selecting a line:
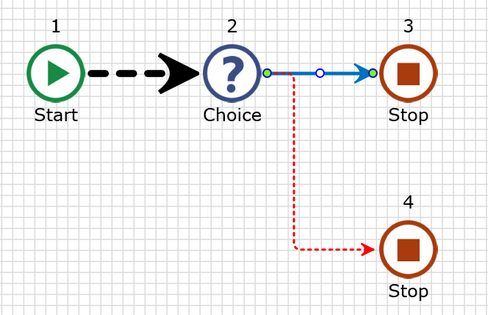
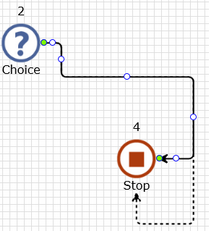
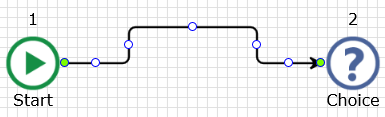
A line connecting two steps consists of a sequence of segments that are alternately horizontal and vertical. A straight line consists of one segment only. For example, a line connecting a choice step with its lower follower consists of three segments: one horizontal to the left, one vertical downwards and second horizontal to the left.
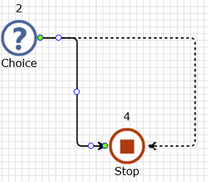
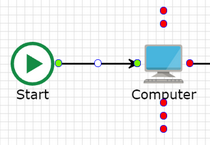
You can select a line in the design mode by clicking on it. Once a line is selected its ending points as well as the middle points of each of its segments become marked by small circles - the ends by green ones, the middles by white ones.

Line styling:
You can change the styling of an individual line in the design mode.
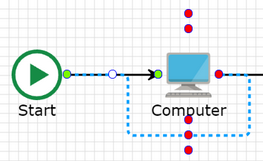
Select the line. The following properties will appear in the Properties pane:
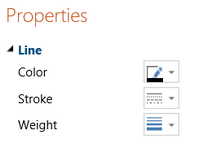
Currently, you can change the line color, weight and stroke (dashed, dotted and continuous).
Moving a line segment:
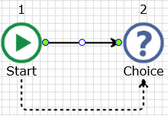
You can move a line segment by clicking it on its middle point and dragging it left-right (vertical segments) or up-down (horizontal ones). The cursor will change from the Normal Select to Horizontal/Vertical Resize.
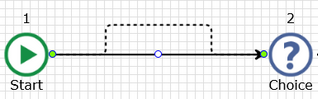
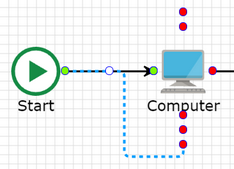
While a segment is being dragged you will see its future shape in the form of a dotted line:
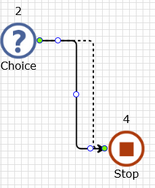
Notice that, in this example, the ending point of the moved line is changing depending on the new position of the segment.
If a straight line is moved then both its end points are changed:

In order to modify a line you have to drop the segment in the selected place.
Increasing the number of segments:
You may wish to add segments to the line to draw it more sophistically between the process steps.
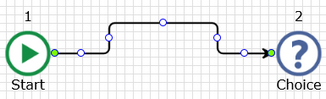
You can easily add a new segment by dragging one of the ending segments of a line:
Each time you drag the end segment beyond the edge of a step icon a new segment is added at the end of the line.
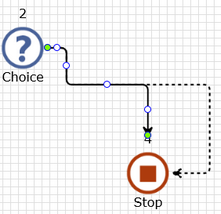
You can also create three new segments in the middle of an existing one. Just press <Shift> key while dragging the middle point of the segment.
Decreasing the number of segments:
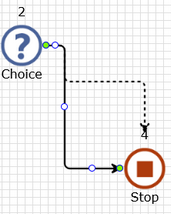
In some situations, you can also decrease the number of segments of a line. If a line becomes too complex as a result of moving its ending steps you can just double-click it in order to make it simpler. If the ending steps of the line are in the same row or in the same column then a straight line will be created. Otherwise, a Z-shaped line will be created between steps. You can easily convert the Z-shaped to an L-shaped line by moving its middle segment.
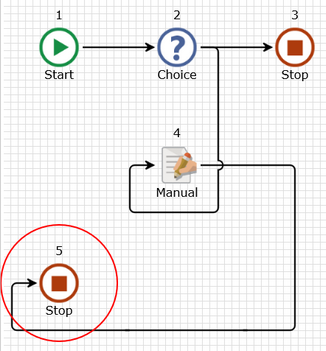
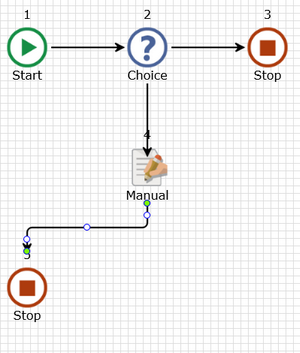
In the example above, double-clicking a line connecting the Manual and the Choice converts it into a straight line, and double-clicking a line between the Manual and the Stop converts it into a Z-shape line.
A segment can also be removed as a result of dragging another segment. When two segments of a line are too close to each other they are automatically reduced to one segment. If a segment becomes very short then it is automatically removed and the neighboring segments are glued together. Consider the following line:
If you drag downwards the middle point of the central segment of this line then, at a certain moment, the length of the both adjoining vertical segments will become so small that they will be removed and the remaining three segments will be glued together into one.
Similarly, if you drag one of the vertical segments in the direction of the other one then at a certain moment the length of the middle segment will become so small that it will disappear together with the both vertical segment and the remaining two horizontal segments will be glued into one.
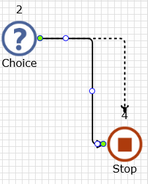
Moving a line end:
The line ends are automatically moved when you move the line segments. You can also move a line end directly.
Click on an ending point of a line and keep the mouse down. The cursor will change from the Normal Select to Move. All possible locations of this ending point will be marked by small red circles. They are always seven such locations, one on the left and right side of an icon, two above and three below the icon. You cannot move an ending point to another icon because you cannot change the order of steps determined by the connecting lines..
Now, drag the ending point to another possible location. A dotted line will show the shape of the resulting line.
In order to modify a line you have to drop the line end in the selected place.