
Behind different shapes you can link processes. This sort of set up can be used as a "project house" or an electronic handbook style environment, where employees can easily navigate to processes and folders relevant to them.
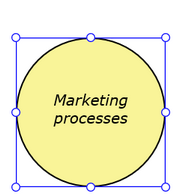
A shape is a basic component of an overview diagram. It is just a colored rectangle, triangle, ellipse, diamond, chevron, hexagon, arrow or star with a text inside. It can be positioned in any place in the diagram.
To create a new shape press one of the buttons in the Insert group of the Diagram tab.

Alternative:
| ► | Right mouse click the diagram. Pop-up menu will appear. Select Insert and then the required shape. |
A special type of an overview shape is an image.
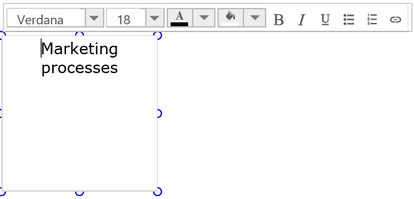
The new shape will be placed in the top left corner of the diagram or on top of the currently selected shape. It will be switched automatically to the edit mode. Thus, you can immediately start typing the text. In order to leave the edit mode it is enough to click somewhere outside the shape. In order to enter the edit mode again double click the shape. You can format parts of the shape text independently. Use the bar above the shape to choose for the font family, size, style and to decide on the style of a list. You can also insert a hyperlink there.
In order to move or to resize a shape click it and then drag it to the desired place or move its border holding one of the small circles on the edge. You can also switch on the diagram grid that will help you adjusting the positions of the shapes.
A shape has graphical properties that you can adjust to change its presentation. Moreover, you can link diagrams and documents to a shape.
In order to delete, cut, copy or paste a shape right mouse click a shape in the diagram. A pop-up menu will appear. Select Delete, Cut, Copy or Paste.
Alternative:
| ► | Use the standard keyboard shortcuts. |
| ► | You can delete a shape by pressing the Delete button in the Actions group of the Home tab. |
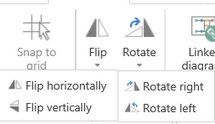
You can also do the following operations on a shape:
- Flip horizontally
- Flip vertically
- Rotate right
- Rotate left
- Bring to front
- Move to back
Just right mouse click a shape and select the corresponding item from the menu.
Alternative:
| ► | To flip or to rotate a shape press the corresponding button in the Actions group of the Diagram tab and select the required direction. |
Can I change the visual properties of a 'shape'?
If you select a shape on of overview diagram in the Diagrams pane then its properties are shown in the Properties pane. You can change these properties there to adjust the way a shape is presented to a user.

Properties in the Links category show the linked diagrams and linked documents.
You can define the Font, Text and Shape properties for the selected shape.
If you choose for Automatic Font family, Font size, Font style (button ![]() ) or Text color then the values shown in the Diagram font group of the Layout tab will be used.
) or Text color then the values shown in the Diagram font group of the Layout tab will be used.
-
Use the Lock aspect ratio box if you want to keep the aspect ratio for the selected image when it is being resized.
- Use the Fill property to change the color of the shape
- Use the Outline property to change the color of the line around the shape
- Use the Outline Stroke property to change the type of the line around the shape
- Use Outline Weight property to change the thickness of the line around the shape
- Use Alignment property to align the text inside a shape. You can align it both horizontally (left, center, right) and vertically (top, center)
If you select an image shape then there are two more properties shown:

The Name property shows the name of the linked image file. Click a small image icon behind the name if you want to change the image file linked to the selected image shape.
Click in the Transparency combo box in the Properties pane to select the required level of transparency.
How can I use an 'image' in my overview diagram?
An image is a rectangle shape filled with a picture. To create an image shape press the Image button in the Insert group of the Diagram tab. The following dialog appears:
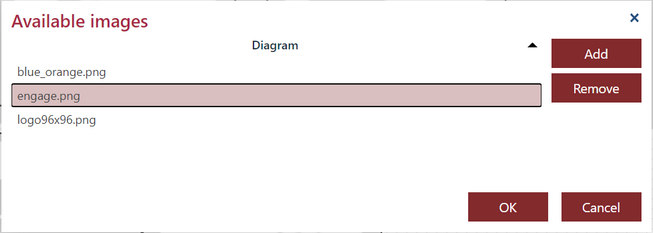
The list shown in the Available images dialog is the common list of images added by all users of your organization (both modelers and publishers). If you miss an image you can add one and it will be available for all other users. Press the Add button to open the Select file dialog in order to upload one of your png, jpg or jpeg files. Then, select the image for the shape and press OK.
Initially, an image is put into a square shape. You can then resize it and move it. If you want the shape to show the image with its original aspect ratio, select the shape and press the Lock aspect ratio button in the Properties pane. Use the small image button from there to change the image of the shape.
You can type a text on top of the image. Just double click the image shape and start typing.
You can also remove an image from this list. Select an image and press the Remove button. If the selected image is still used in the overviews you will get the following warning:
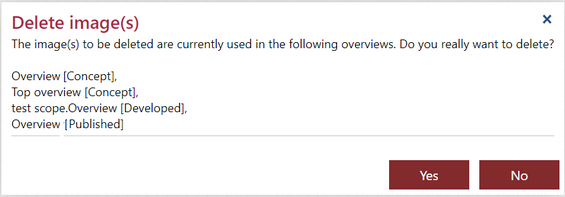
Since the same overview can be developed in the Engage Process Modeler, can be submitted or prepared for publication as a concept in the Under review pane or can be already shared or published then there is a label in brackets added at the end of the overview name indicating where to look for the overview. The overviews developed in Engage Process Modeler are prefixed with a name of the embedding project.
If the image is not used you will still get a confirmation question.