
The diagrams published in the Engage Process Publisher (and shared in the Engage Process Modeler) are shown in the Engage Process Viewer. Using authorization settings you can limit the set of visible published diagrams as well as the functionality of the Engage Process Viewer for each particular user and group in your organization.
By authorizing viewers you give users and groups rights to view certain published diagrams and folders in the Engage Process Viewer.
Additionally, you can restrict the functionality of the Engage Process Viewer for particular users or groups by specifying viewer settings. You can also decide on the initial overview diagram that will be automatically open for particular users.
If your subscription contains the Feedback module, then you can also specify the list of users who will get notifications about new comments.
How do I manage the authorization of Users and Groups?
Creation and management of users and groups is done by an authorized user who is in the User manager role. This functionality is out of scope of the Engage Process Publisher.
A user can belong to many groups. You can give users, groups and the embedding organization the View published rights to view specific published diagrams in the Engage Process Viewer. (Similarly, a modeler can give the View shared rights to view specific shared diagrams in the Engage Process Viewer)
All users inherit rights from the embedding organization. Additionally, each user inherits rights from all groups he belongs to. Thus, the set of actual rights of a user are composed of the specific rights of this user plus the rights of all groups the user belongs to plus the rights of the organization.
How do I change who can see view published diagrams (and/or leave feedback)?
To authorize users to view a folder or a diagram and to make comments on a diagram in the Engage Process Viewer, select this folder or diagram in the Publication pane and press the Authorization button in the Publish group of the Home tab.

The following dialog appears:
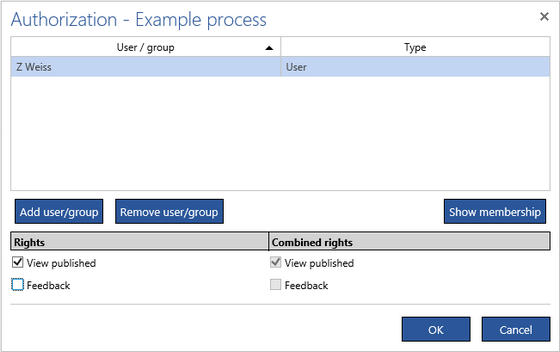
This dialog appears also automatically when you publish a new diagram or a set of diagrams. Then, by default, you are selected as the only user who can view the published diagram. However, if the diagram is published into a folder then the folder authorization is shown as default.
There will be two additional check boxes in n the Authorization dialog for a folder:

Check Replace authorization on lower level folders and diagram with this authorization if you want that the folder authorization defined in this dialog will apply to all embedded folders and diagrams.
Check Apply only newly added and removed authorizations on lower level folders and diagrams if you want that only the changes will apply to all embedded folders and diagrams, e.g. if you want to add a user and give him the same rights to all lower levels.
If you do not check any of these boxes the authorization will apply to the selected folder only.
If your subscription contains the Feedback module, then you also can assign the Feedback right in this dialog. The viewers who have this right can create comments on the diagram.
If you want to remove the rights of a user, group or the whole organization, click the corresponding unit in the list above and then press the Remove user/group button or just uncheck the View published (and the Feedback) rights. You can also select more units and remove them in once by pressing the Remove user/group button.
If you want to add the rights to a user, group or the organization press the Add user/group button. The following dialog appears:
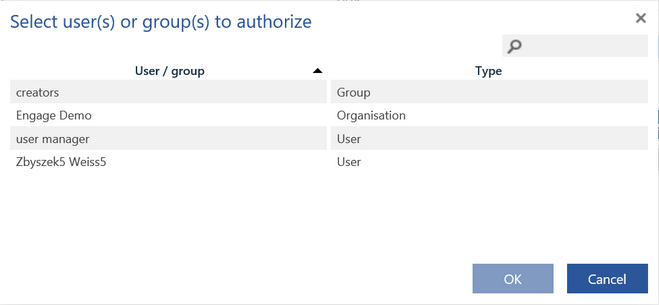
Select the corresponding unit from the list and press OK. Use the search box on top of the list to find the required user or group.
The View published rights will be automatically checked for the newly added unit.
Notice that even if the View published box (or the Feedback box) is not checked yet the read-only check box in the right column that specify the actual combined rights may be already checked. This is because a user inherits rights from all the groups he belongs to and a group inherits rights from the organization. You can check the membership of a user or the list of members of a group by clicking the Show Membership/Show Members button. The following dialog with the group or user list appears:
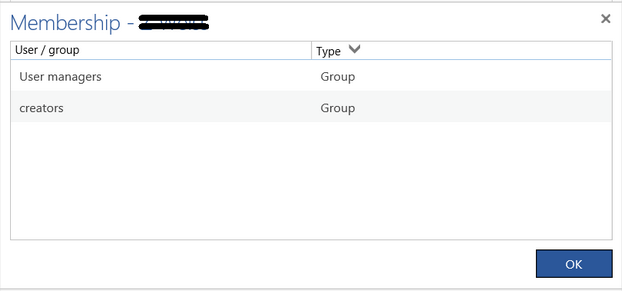
The membership can only be changed by an authorized person in the User Manager role.
How can I change what functions are visible to a user of group?
You can specify not only what diagrams will be available for what users in the Engage Process Viewer but you can also specify what functionality of the Engage Process Viewer will be available and how this tool will be presented to specific users
Press the Viewer Settings button in the Viewer group of the Home tab.
The following dialog appears:
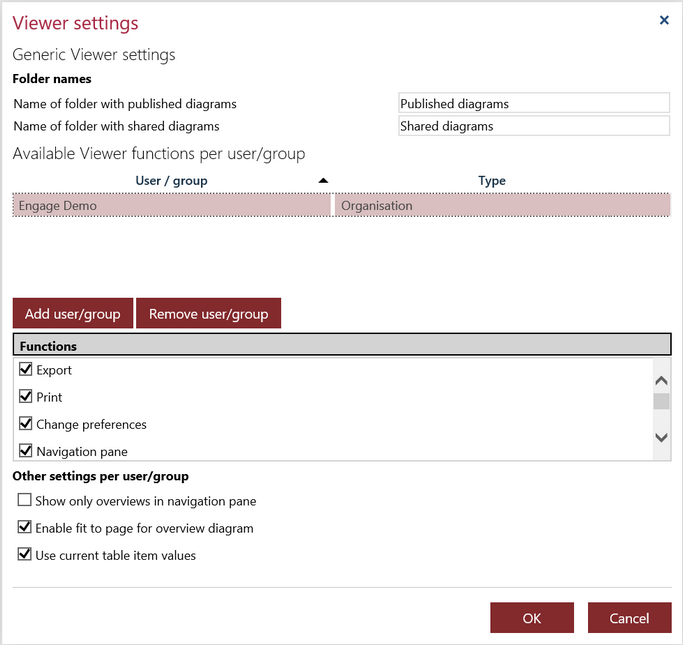
This dialog shows different settings for the Engage Process Viewer.
In general, the Engage Process Viewer shows diagrams grouped in two folders: Published diagrams and Shared diagrams. You can change the standard names of these folders. Type new published and shared folders names in the Name of folder with published diagrams box and Name of folder with shared diagrams box, respectively.
Initially, only your organization is shown in the Viewer functions list. If you select this unit you will see that all Functions in the list below (except Show only overviews in navigation pane) are checked for it. This means that initially the Engage Process Viewer offers its full functionality to all users in the organization. If you want to limit this functionality for all users just uncheck some boxes. For example, if you uncheck the Change password function, the users of the Engage Process Viewer will not be able to change password in this tool.
If you want to restrict the functionality separately for each user and/or group in the organization, press the Add user/group button to add the unit for which the restrictions will be specified. You will find how to add and remove users and groups and how to inspect the membership in the description of the authorization dialog. Notice that you can remove all units except the organization.
For example, if you add a group and uncheck the Print function only for it, then all users who belong to this group will not be able to print. However, they will be able to change their passwords even though this functionality is disabled for the rest of the organization. If you add a user and specify some restrictions for him these restrictions will be taken into account independently of the restrictions for the whole organization and for the groups the user belongs to.
The following functions of the Engage Process Viewer can be disabled for a user or group:
- Export - if you uncheck this box then the user will not see the export buttons in all his report dialogs
- Print - if you uncheck this box the user will see neither the Print item in the File menu nor the print button in all the report dialogs
- Change preferences - if you uncheck this box then the user will see neither Options item of the File menu nor the Save Workspace and the Saved Workspace buttons in the Workspace group of the VIEW tab
- Showing annotations - if you uncheck this box then the user will not see the Annotations box in his show/hide options, so he will not be able to hide annotations or to show them if you have already decided to hide them for a process diagram
- Showing notes - if you uncheck this box then the user will not see the Notes box in his show/hide options, so he will not be able to hide notes or to show them if you has decided to hide them for a process diagram
- Log off - if you uncheck this box then the user will not see the Log off button
- Show only overviews in navigation pane - if you check this box a viewer can navigate only via the overview diagrams accessing the other diagram from overview shapes, if you uncheck it all available diagrams will be shown in the navigation pane
- Enable fit to page for overview diagram - if you check this box all overviews will be shrunk to fit to the current page, if you uncheck it the overviews will get the original sizes
- Use current table item values - if you check this box the current global table values will be shown, if you uncheck it the values from the moment the process diagram was submitted for publication will be shown
The following panes of the Engage Process Viewer can be hidden for a viewer:
- Navigation pane (it makes sense to hide this pane if all processes can be accessed from a top level overview that is shown initially)
- Properties Pane
- Description Pane
- Document Pane
- Comments Pane
- Helicopter Pane
- Search Result (by hiding this pane you also disable the Find text function)
- Remarks Pane
- Annotation Pane
Click the OK button to confirm your Engage Process Viewer settings.
You can see the result of the overview settings for all users and groups in your organization if you press the Viewer settings report button of the REPORT tab in the ribbon.
How can I direct people to a specific overview diagram to guide them to their relevant processes?
There are two ways of accessing a particular diagram in the Engage Process Viewer. A user can click this diagram in the navigation pane or he can click a shape in an overview where this diagram is linked. If only the second way is preferred the starting point must be somehow specified. This is done by initial overviews.
An initial overview is an overview diagram that is shown in the Engage Process Viewer when it is open for a particular user.
You can specify what is the initial overview for each user or a group of users. Initially, there are no initial overviews, so the diagrams (at least the first one) can only be accessible from the navigation pane (then, it is not very wise to hide the navigation pane in the viewer settings).
Press the Viewer initial overviews button in the Viewer group of the Home tab. The following dialog, similar to the Authorization dialog, appears:
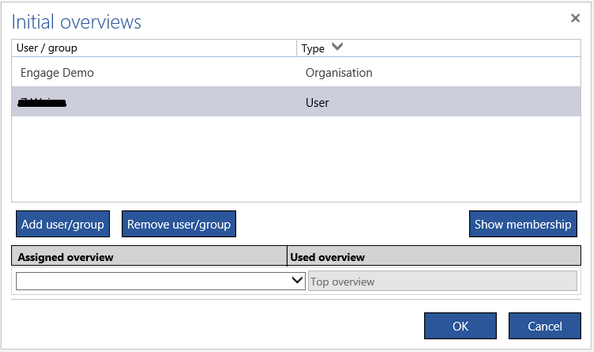
There is always at most one overview specified for a user, a group or the organization. Select this overview in the Assigned overview combo box. This combo box will show you the list of all published overviews. Press Add user/group if you want to specify a particular initial overview for another user or group (in the description of the authorization dialog you will find how to add and remove users and groups and how to inspect the membership).
After adding a new user or group you will see the name of its inherited initial overview in the Used overview column (in the example above, the user inherits the Top overview from his organization). Select another overview the Assigned overview column to override the inherited one.
Press the OK button to confirm your initial overview settings for the Engage Process Viewer users.
You can see the summary of the initial overviews for all users and groups in your organization if you press the Initial overview report button of the REPORT tab in the ribbon.
How can I manage who gets emailed when feedback is left?
When a diagram is published, it is immediately visible for authorized viewers in the Engage Process Viewer. When a viewer comments n a published version the system will send an email, and you can specify who receives this.
Note: This functionality is only available, if your subscription contains the Feedback module.
At the moment a diagram is published, it immediately becomes visible for the authorized viewers in the Engage Process Viewer. The viewers can create comments on the diagram. When a viewer creates a new comment on a published version the system will send a notification e-mail. You as a publisher can specify the list of recipients of that e-mail.
Select a diagram in the Publication pane and press the Feedback notification list button in the Feedback group of the Viewer tab. The following dialog appears.
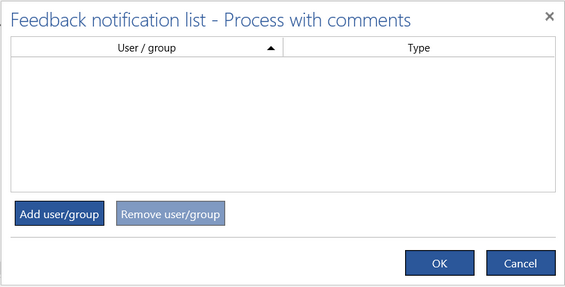
It is similar to the upper part of the authorization dialog. Press Add user/group button to add new elements to the list:
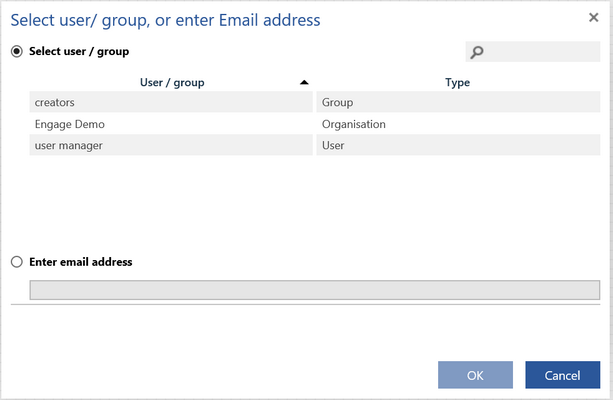
The dialog that appears is similar to the one for authorization but now you can either select an existing user, group or organization or just enter a new email.
Select a set of users/groups from the list box above or click Enter email address radio button and enter an e-mail in the text box below. Then press OK.
If you select a group, then all users in this group will receive a notification.
If you select an organization, then all users of the organization will receive a notification.
Notifications will be send on the addresses specified by Engage usernames. If you want to use another e-mail address you have to type it here. In this way you can send notifications to persons that are not even the users of Engage.
You can select more diagrams in the Publication pane if you want to specify a common notification list for all of them.
The same dialog is used to update the existing feedback notification lists. You can also select more than one diagram for update. However, it may happen that the diagrams that you selected have different notification lists. Then, the dialog that appears will have an additional warning:
![]()
Only the common part of the notifications lists of the selected diagrams will be shown in the dialog. If you press OK now you will get the following warning:

If you press No the changes to the notifications lists will not be applied.