
Engage Process Modeler is a tool designed to support the fast and easy process mapping and analysis, It is particularly useful during workshops where all the process participants are present. Using Engage Process Modeler a process diagram is built based on the activities and decisions that the participants take or will take in the process. Sometimes, however, these activities and decisions are not fully realized and must be discussed before the process is even started to be mapped. In order to support such preliminary discussion the Brainstorm diagrams are designed.
A brainstorm diagram consists of a set of notes that can be ordered into column and rows. Actually, it is a digital version of paper sticky notes (also know as yellow stickers) commonly used during workshops and discussions.
To create a brainstorm diagram you have to add a new project element of the type Brainstorm.
The new brainstorm diagram will be opened. Initially, the diagram is empty. The set of step types in the Insert group of the Home tab will be replaced by the set of object types that can be inserted into a brainstorm diagram.
These are:
| • | Notes of different colors |
| • | Columns |
| • | Rows |

Note that all actions in the Analysis tab, all actions in the Layout tab except diagram font setting, and all actions in the Design tab except Snap to grid are disabled now because they refer to process diagrams only.
How do I use 'Notes' to create a Brainstorm?
A note is a basic component of a brainstorm diagram. It is just a colored rectangle with a text inside. It can be positioned in any place in the diagram. Every new note gets its own unique number that is shown in its top left corner. The user can edit the text of the note and change its graphical properties (but cannot change the number).
To create a new note press one of the Note buttons in the Insert group of the Home tab.
Alternative:
| ► | Right mouse click on the diagram. Pop-up menu will appear. Select Insert and then Note of the required color. |
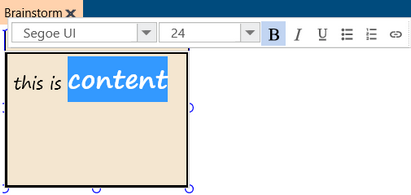
The new note will be placed in the top left corner of the diagram or on top of the currently selected note. It will be switched automatically to the edit mode. Thus, you can immediately start typing the text. In order to leave the edit mode it is enough to click somewhere outside the note. In order to enter the edit mode again double click the note. You can format parts of the note text independently. Use the bar above the note box to choose for font family, size, style and to decide on the style of a list.
In order to move or to resize the note click on it and then drag it to the desired place or move its border holding one of the small circles on the edge.
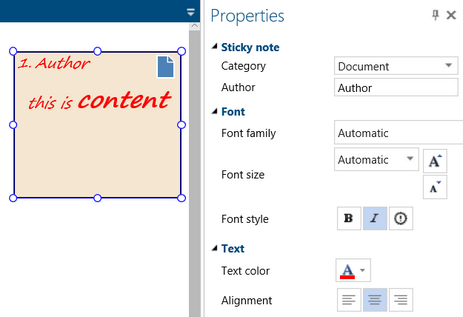
The note has also its properties. They consists of graphical component properties (that you can use to set its font, text and shape properties) and of two properties specific for a note: Category and Author.
There are four categories of a note:
- Unknown
- Activity
- Role
- Document
Initially, the Category property is Unknown. If you change it to one of the other three then a small icon representing the category will be seen in the top right corner of the note. Categories are used to convert a brainstorm diagram to a process.
If you enter the Author property it will appear on top of the note, next to its number.
You can Delete, Cut, Copy and Paste selected notes using the corresponding buttons in the Actions group.
Alternative:
| ► | Right mouse click on selected notes in the diagram. Pop-up menu will appear. Select Delete, Cut, Copy or Paste. |
You can bring a note to front, move it to back or change the color of the note to one of the standard colors. Just right mouse click a note and select the proper item.
Submitting Notes from smartphone apps:
There is a possibility to submit a note to a brainstorm diagram either from a smartphone or from another computer.
Download the Engage Brainstorm application for smartphones (iPhone, Windows Phone 8 and Android versions are available) or use the following link https://brainstorm.engageprocess.com/
to open an html page.
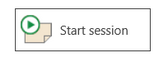
In order to accept notes from external sources the Brainstorm session must be created in the Engage Process Modeler. This is done by pressing the Start session button that is shown in the top right corner of the brainstorm diagram pane.
As a result the 6-character Brainstorm session id appears in the top right corner of the Brainstorm diagram:
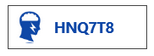
Enter this session id in the Engage Brainstorm application or in the html page. You can also optionally enter your name. It will appear on the top of each note you will submit.
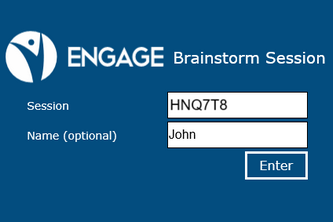
From now on you can type the text of a new note and submit it to the Brainstorm diagram.
The new notes appear on the top right side of the brainstorm diagram few seconds after being submitted. Then the Engage Process Modeler user can move them and update in the same way as the other notes.
Press the button with the session number again to finish the session. The session id disappears from the screen and the submitted notes will be not accepted anymore.
Only one brainstorm diagram can have an active session at a moment.
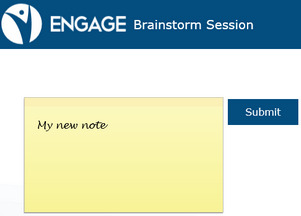
Using Engage Brainstorm application you can prepare your notes in advance and submit them at the moment the session id is known. Use the Add button to add new note to the list on you phone, the Select button to select notes, the Delete button to delete the selected notes from the list, and the Submit button to submit the selected notes to the Brainstorm diagram that has an active session.
How can I order my Notes in Brainstorm?
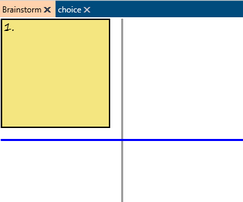
A column (row) is a space between vertical (horizontal) lines in the background of the brainstorm diagram. Initially there is only one column (row) with the unlimited width.In order to add a new column (row) just press the Column (Row) button in the Insert group of the Home tab.
Alternative:
| ► | Right mouse click on the diagram. Pop-up menu will appear. Select Column (Row). |

A new vertical (horizontal) line will appear in the background of the diagram on the right-hand side (below) of the last already existing vertical (horizontal) line. The initial width of the new column (row) is a little bigger than the initial width (height) of a note so the note can fit nicely into the column (row)..
In order to delete a column (row) just click on the vertical (horizontal) line and press the Delete button in the Actions group.
Alternative:
| ► | Right mouse click on a vertical (horizontal) line in the diagram. Pop-up menu will appear. Select Delete. |
In order to resize a column (row) click on the vertical (horizontal) line and drag it to the left or right (up or down).
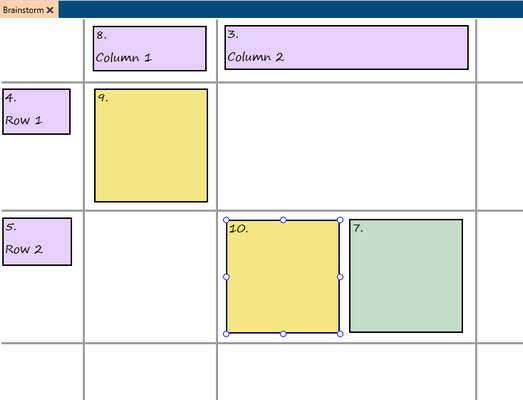
Columns (rows) have no specific names but you can always create the header notes if necessary, as in the example below.
.
How can I rename, delete or export a Brainstorm?
In order to delete/copy a brainstorm diagram select it in the Project pane and press the Delete/Copy button in the Actions group of the Home tab.
Alternative:
| ► | Right mouse click on the brainstorm diagram in the Project pane. Pop-up menu will appear. Select Delete/Copy. |
In order to rename a brainstorm diagram select it in the Project pane and press the Rename button in the Actions group of Home tab.
Alternative:
| ► | Right mouse click on the brainstorm diagram in the Project pane. Pop-up menu will appear. Select Rename. |
In order to zoom a brainstorm diagram follow the Zooming instructions.
Use buttons and combo boxes in the Diagram font group of the Layout tab to set the common font properties for notes. These settings will not apply for notes that have already individual font settings.
You can export a brainstorm diagram to an Engage file and to PNG file.
Go to the design mode to better adjust the positions of sticky notes.