The multiple cross reference report allows you to get information about relationship between multiple items. For example, Roles per Location per Step report will show you in what steps a specific combination of a role and a location is used.
Using a simple cross reference report you can get information about relationships between two items (or an item and a step or an item and a process). For example, in the Roles per Step report you will see what roles are used in what steps, in the Location per Step report you will see what locations are used in what steps, in Roles per Location report you will see what roles and locations are used together.
The multiple cross reference report allows you to get information about relationship between multiple items. For example, Roles per Location per Step report will show you in what steps a specific combination of a role and a location is used. Roles per Location per System will show you what roles, locations and systems are used together.
To select columns for a cross reference report do one of the following:
- Press one of the buttons in the Project group of the Reports tab. Select processes the report must be created for and press the Next button (see Cross reference report wizard)
- Press one of the buttons in the Process group of the Reports tab.
The following dialog appears (some columns can be already selected if you have pressed one of the shortcuts):
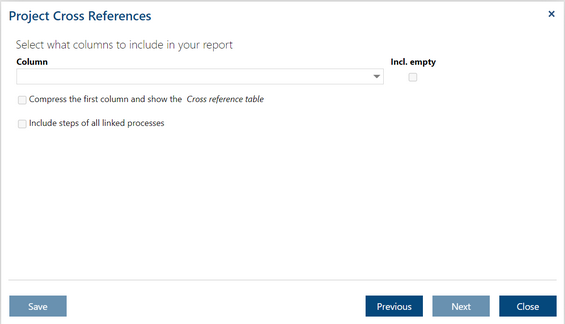
Select the first column name in the Column combo box. The combo box for the second column appears automatically and you can continue selection.
The list of selectable items for both project and process reports consists of
- Documents, Documents. Description, Documents.Url
- Input
- Output
- Documents (all), Documents (all).Description, Documents (all).Url - the report will show all documents assigned to a step in one column, thus all documents together that are specified in the Documents, Input and Output properties.
- Roles, Roles.Description, Roles.Cost/hour
- Step specific properties: Description, Remarks, Annotation, Note, Type
- All custom types with the Steps scope.
Moreover, the following items will be added for project report
- Processes and Processes and Process Steps - only one of them can be selected
- Process specific properties: Description, Remarks, Annotation, Created at, Created bby, Change at, Change by, Process owner, Process manager, Process location (location of that process in the project tree)
- Netto input, Netto output
- All custom types with the Processes scope.
and the following item will be added for process reports:
- Steps
If the added custom type T has a fixed or contextual property P then T.P will be added to the list; for example, if the custom type Location has a fixed property Address then you can make a report with the columns Process, Location, and Location.Address.
Additionally, T.Description will be added and if the type T has Cost/hour property then also T.Cost/hour will be added. If the type T has Cost/unit property then also T.Cost/Unit and T.Number of units will be added.
If you select Processes and Process Steps as a column name then your final report will have one column for a process name followed by one column for a step name. Thus, the resulting report will have at least three columns.
If you select Processes then your final report will have one column for a process name that means that your report will show the relationship between items on the process level only.
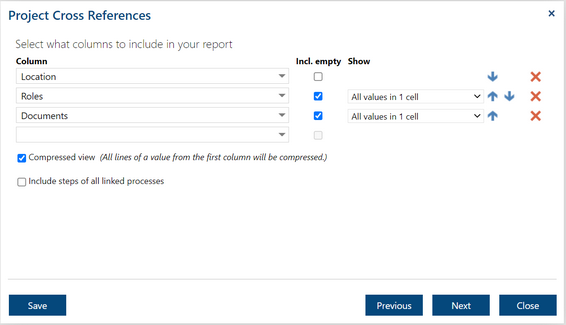
Use blue arrows up and down to change the order of the already selected columns.
Use red cross button to delete a column.
Check the Compressed view box to get the compressed report.
Check the Include steps in all linked processes if you want to get a report for a process with all process links expanded. Otherwise the report will be created for all process links collapsed, even if you have saved the process with some process links expanded.
Check the Incl. empty check box for a column to include the process steps in the report where the value of the selected property is not defined. (In the example above, the undefined Documents will be included.)
Then, a row with an empty value can appear in the cross references report. For example:
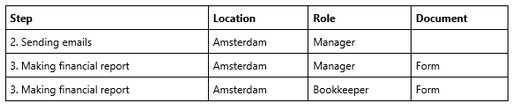
We can see in this report that Amsterdam, Manager and Form are used together in the Making financial report step and Amsterdam and Manager are used together in the Sending emails step but a document is missing there.
If you want to see all steps that have at least one of the columns Location, Role and Document not empty then you have to check all three Incl. empty check boxes. This is because if one column is not empty the other two can be still empty. But then, you will also get steps that have all three columns empty.In this situation, however, an additional check box appears Hide empty rows. If you check this box then the rows with all three values empty will be filtered out.
In general, the Hide empty rows check box appears if you check all enabled Incl. empty check boxes and there is more than two columns selected.
Press OK when you have selected all necessary columns.
To create a simple cross reference report you must select exactly two columns. Then, the resulting report will have both the list and cross reference views (see online reports) and you can export it to PDF, MS Word and MS Excel.
If you created multiple reference report you can export the resulting report to MS Excel spreadsheet only by pressing the Excel button in the left bottom corner.
How can I save a defined cross-reference report type?
If you want to reuse the same categories for a cross-reference report, you can save it so that you can use the same definition of report in the future.
Once you have defined a cross reference report you can save its definition for future use.

In order to save the report definition just press the Save button.
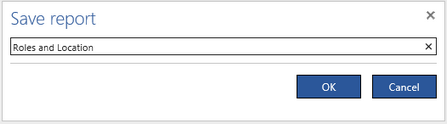
In the dialog that appears, type the report name and press OK. You will return to the wizard dialog. The Remove button will appear there. Press the Next button to create the report or press the Close button to close the wizard.
Now, you will see that the Cross References button gets a small triangle below. If you press this triangle you will see a drop-down list with a new button (Roles and Location in this example).

If you press the Roles and Location button then the wizard dialog will open. If it was a project report you will be asked to select processes, otherwise the wizard will start directly from column selection dialog with the saved columns already preselected.
Press Next to create a report. You can also update the definition (e.g. by changing the order of columns, or adding/deleting column) and then press Next to create the modified report.
Press the Save button if you want to save the updated definition.
Press the Remove button to remove the report definition. The confirmation question appears:
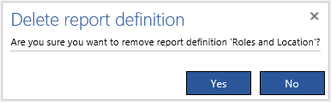
If you press Yes you will get the confirmation message: