
How can I configure Teamboard work views?
In order to configure teamboard views press the ![]() button on the top of the application window on the right hand side of the teamboard name. Then, select the Views page in the dialog that appears.
button on the top of the application window on the right hand side of the teamboard name. Then, select the Views page in the dialog that appears.
Press a small triangle on the top of the dialog page to select the view you want to configure.
You can configure board view cards (for Kanban board, Combined kanban board or Task board) and configure table columns for Table view here. The Calendar view does not require any additional configuration.
The set of work views for a teamboard is fixed and defined at the moment of its creation from a template. You cannot delete a view or create any new one.
How can I configure the cards used in Teamboard?
To configure cards for a particular view select it in the combo box on top of the Views page of the Board configuration dialog.
You will see a list of cards on the left hand side, one card for each work item type and one for a task (if present).
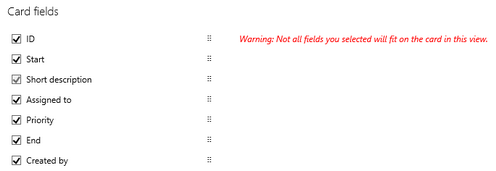
Select the card you want to configure. In the middle you will see a list of all fields of the selected work item type or task. Check the fields that you want to see on the card, uncheck the fields that you want to remove from the card. The title field must always be selected here.
Notice that the size of a card for Combined kanban board and Task board is limited because they both are showing cards in a grid. In case you select too much fields for these boards you will get the warning:
If you select a field in the middle list then its presentation properties appear on the right hand side. You can decide here about the following:
- If the field on a card is read only or writable; this applies only to fields that the value you can change; however, the title field is never writable on a card.
- Maximum lines of the long text fields shown on the card.
- Positioning of the value and its caption in one line of a card, the following placement is possible:
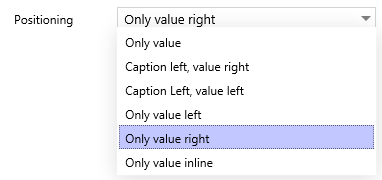
Only value inline means that value does not occupy separate line but is appended to the value of the previous line.
How can I configure work items?
In order to configure teamboard work items press the ![]() button on the top of the application window on the right hand side of the teamboard name. Then, select the third page in the dialog that appears (its name is configured on the Generic page).
button on the top of the application window on the right hand side of the teamboard name. Then, select the third page in the dialog that appears (its name is configured on the Generic page).
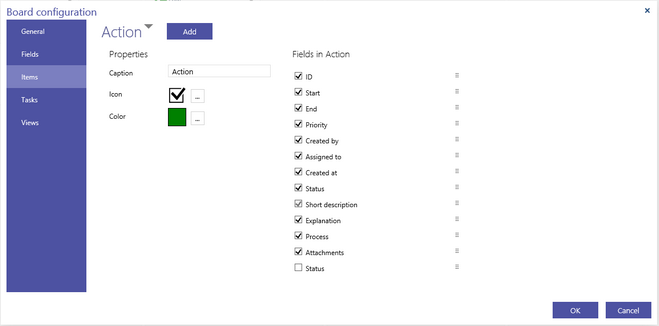
The name of the selected work item type appears on the top left of the page. You can change it by changing the text in the Caption text box.
Press the three dot button after Icon to change the icon identifying this type of work item.
Press the three dot button after Color to change the color identifying this type of work item.
The list on the right hand side shows all fields defined on the Fields page. Check those fields that you want to include into this type of work items.
To change the order of the fields drag the corresponding six dots button up or down. The order specified here will be used in the edit dialog for this type of work item.
To configure another work item type press a small triangle on the top and select this type from the list.
Press the Add button to add a new work item type. Type the name of the work item type and press OK. The new type will be added to the list and automatically selected, so you can start configuring it.
If the teamboard does not contain any work item of the selected type you can delete such a type without any consequences. In this case, the Remove button appears. In particular, it always appears for the new work item type. Press the Remove button to remove the selected work item type from the list of available work item types.
How do I configure tasks?
In order to configure teamboard tasks press the ![]() button on the top of the application window on the right hand side of the teamboard name. Then, select the fourth page in the dialog that appears.
button on the top of the application window on the right hand side of the teamboard name. Then, select the fourth page in the dialog that appears.
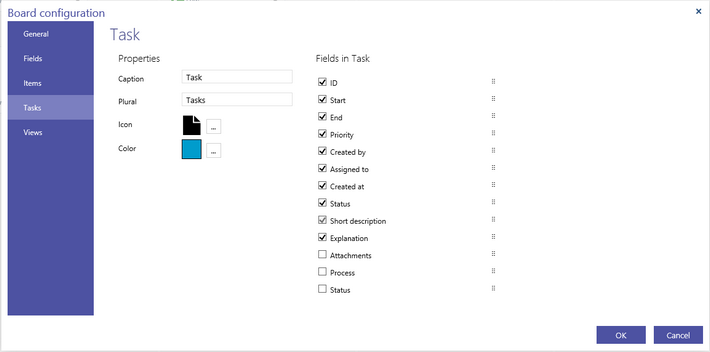
We use a generic term "task" in this manual, but you would like to use different terms like "Job", "Work", etc. in particular teamboard applications. On this page, you can give the task your own name. This name will replace the term "task" in all dialogs and messages shown for the opened teamboard. Notice that while changing the text in the Plural box the name of this page is also changing. Consequently, while changing the text in the Caption box the name on top of this page is also changing.
See Configuring work items to learn how to configure the rest of the task properties.
Notice that although you can add or delete a work item type you can neither add nor delete add a task type. The existence of the task type is determined at the moment the teamboard is created from a template.
How do I configure table columns?
To configure table columns select the Table on the Views page of the Board configuration dialog.
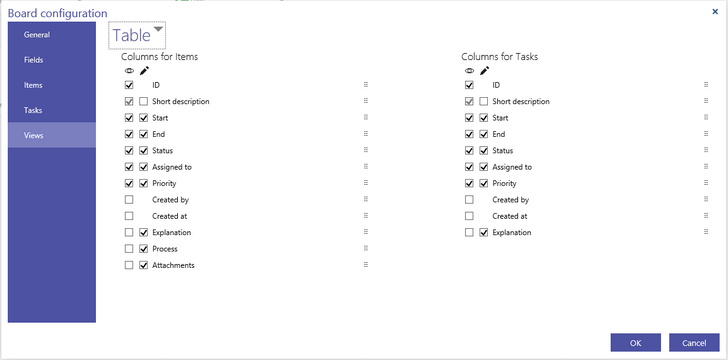
You will see a list of all work item fields on the left hand side, and a list of all task fields on the right hand side.
Check or uncheck the boxes in the first column to decide what fields should appear in the Table view. The work items columns can be still reconfigured individually per user in the Table view itself.
Check or uncheck the boxes in the second column to decide what fields will be writable or read only in the Table view. Notice that you cannot do it for the system fields. They are always read only.
To change the order of the Columns drag the corresponding six dots button up or down.
What different fields can I configure on a teamboard?
In order to configure teamboard fields press the ![]() button on the top of the application window on the right hand side of the teamboard name. Then, select the Fields page in the dialog that appears.
button on the top of the application window on the right hand side of the teamboard name. Then, select the Fields page in the dialog that appears.
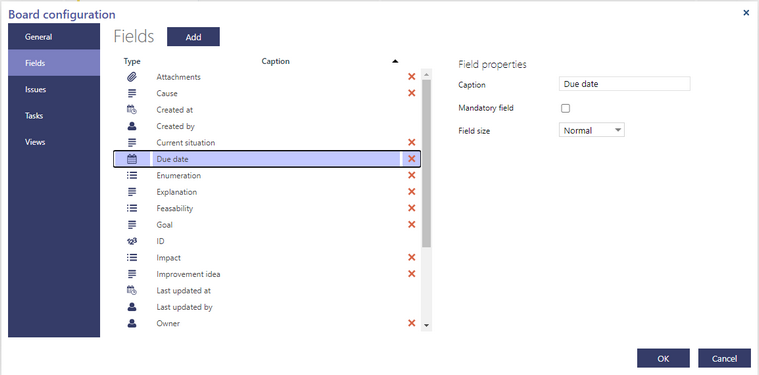
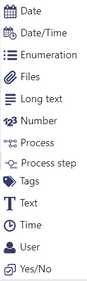
On the left hand side of this page there is a list of all fields used in the teamboard. The list has three columns. The first column contains an icon indicating the field type. The following icons are used:
The last column contains the delete button that you can use to delete a field. Notice that not all fields can be deleted. You cannot delete system fields and the title field (Short description in this example).
Select the field you want to adjust. The field properties that you can adjust appear on the right hand side. They depend on the type of the selected field.
All fields have the Caption property.
All fields, except the Attachments field, have the Field size property. It can take one the the two values: Normal that means that the field's width will take half of the width of the form and Wide that means that the field will take the whole width of the form.
Some fields have the Mandatory property. Fields of the special types User, Files and Process are never mandatory, system fields and the title field are always mandatory.
Other field types have the following additional properties:
|
Field type |
Property name |
Description |
|---|---|---|
|
User Enumeration Process step |
Allow multiple values |
Only one or more than one user can be selected (this property is disabled for Status field) |
|
Long text |
Lines |
Number of lines of the edit box that is showing this field without scrolling |
|
Numeric |
Decimals |
Number of digits after decimal separator (from 0 to 5) |
To change a field caption, type a new caption in the Caption text box.
To make the field mandatory check the box Mandatory field.
To configure enumeration field follow the instruction in the Configuring enumeration.
To delete a field press the corresponding red cross button. If this field is already used in work items or tasks you will be asked for confirmation.
To add a new field press the Add button. The following dialog appears:
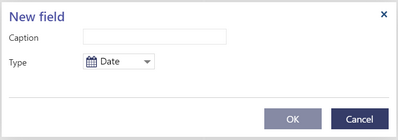
Type the caption of the new field, select its type and press OK.
The new field will be added to the list, its properties will appear on the right, so you can configure them.
There can be at most one field of type Tags in the teamboard.
There can be more fields of type User, but at most one field of this type can generate notification emails.
Note: After adding a new field you should also add it to at least one work item type or task, otherwise you will not be able to see or modify its value.
To add a Process or Process step field follow the instruction in the Adding process or process step.
Press the OK button when you are ready with the adjustments. The teamboard will be reloaded.
What data fields are available to include in a work item/task in Teamboard?
The following fields are always available in a teamboard. They all are read only and they cannot be deleted. Their values are generated by the system for all work items and tasks.
|
Field caption |
Field type |
Description |
|
ID |
Number |
A unique number within a teamboard |
|
Created at |
Date/Time |
Date and time of creation |
|
Created by |
User |
User who has created this item |
|
Last updated at |
Date/Time |
Date and time of last update |
|
Last updated by |
User |
User who made last update |
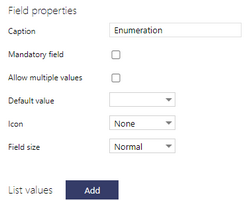
How can I configure enumeration field settings?
A field of type Enumeration requires a list of values. When you create a new enumeration field its properties are as follows:
To add new enumeration value press the Add button. A new row appears under the List values. Type the new value name there. The names of the values must be unique. Press the Add button again to add another value.
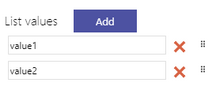
To change the order of the values drag the corresponding six dots button up or down.
Once there are values in the list you can select one of them as a default one. Just select this value in the Default value combo box.
Notice that if you check the Mandatory field box then the default value cannot be empty and it is automatically set to the first value from the list.
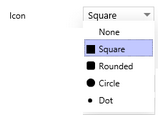
If you want to add a shape appearing in front of each enumeration value select an icon in the Icon combo box.
Once you select an icon the List values changes. By default the colors of the icons will be white.
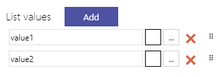
To change the color of the icon appearing in front of the particular value press the three dots button and select a new color.
To delete an enumeration value press the red cross button. The following warning will appear:
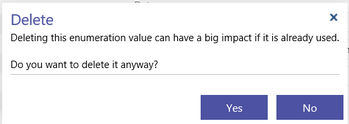
After you apply your configuration changes and reopen the teamboard then the deleted enumeration values will disappear from the combo box list. However, if you have already used them in some of the work items (or tasks) then they will still appear there (with the grey icon). Once you decide to change such a value to another value it will not be possible to revert this change.